Thursday, December 21, 2006

Farewell to Year 2006 and Welcome to Year 2007

Dear kind readers,

We have already at the end of the Year 2006. And according to my computer time, in the next ten days we will have the new year.

There are so many great things that has happened to me during the year 2006, whether in my personal life or in my business life. And for that, I am very thankfull for The Mighty.

I will be in minimalist-blogging during the next two weeks, I will post articles when I have spare time.

Goodbye the Year 2006 and I am looking forward welcoming a wonderful Year 2007. There are so many fantastic things waiting to be happened in the Year 2007.

Finally, from the bottom of my heart I wish you a Merry Christmas and Happy New Year 2007.

See you in the Year 2007.

Wednesday, December 13, 2006

Customizing SLAX - part 2

Continuing my adventure on customizing SLAX, in this installment I want to modify existing SLAX module. The target module is 01_kernel.mo.

Here are the steps I took to unpack the module :

- Install squashfs kernel module. I got a pre-compiled kernel module
(squashfs-kmp-default-3.0_2.6.16.12_3-0.rs.200605040428.i586) for OpenSUSE at Robert Schiele's site.

- I install that kernel module :

# rpm -Uvh squashfs-kmp-default-3.0_2.6.16.12_3-0.rs.200605040428.i586.rpm

Because I am using a different kernel version than the binary version, I copy that module to my current kernel version directory :

# cp /lib/modules/2.6.16.12-3-default/updates/squashfs.ko /lib/modules/2.6.16.13-4-default/misc/

- Make sure file /lib/modules/2.6.16.13-4-default/modules.dep has the following entry :

/lib/modules/2.6.16.13-4-default/misc/squashfs.ko:

- Next, I load squashfs module :

# /sbin/modprobe squashfs

- After that I remove squashfs kernel module :

# rpm -e squashfs-kmp-default

- I create a temporary working directory for SLAX module :

# mkdir /tmp/mod

- Unpack SLAX module :

Change to SLAX tools directory :

# cd slax/tools

Unpack to /tmp/mod directory :
# ./mo2dir ../base/01_kernel.mo /tmp/mod/

And here is the content of that SLAX module :

# ll
total 24
drwxr-xr-x 2 root root 4096 2006-05-06 18:04 boot
drwxr-xr-x 3 root root 4096 2006-05-06 18:04 etc
drwxr-xr-x 3 root root 4096 2006-08-22 00:46 lib
drwxr-xr-x 2 root root 4096 2006-05-22 22:44 sbin
drwxr-xr-x 9 root root 4096 2006-05-22 04:55 usr
drwxr-xr-x 3 root root 4096 2006-08-22 00:46 var

Then you can remove the packages you want. :D

TODO :
I need to find out how to remove packages installed on the SLAX module easily. Creating a script to do that is not an option. :D

Thursday, December 07, 2006

Customizing SLAX - part 1

I am currently learning about how to produce live Linux CD system. Yes I know, this may be very old and very simple for you. But I haven't sharpen my Linux skills since a year and half. This will be a good practise.

I chose SLAX (www.slax.org) because the manual said it was developed to be hacked. So here I am customizing SLAX.

In the first part of the customization, I will remove a SLAX module and add several modules (antivirus, wiping utilities, hash utilities). That's look very easy. :D

Here are the steps I took to do my objectives :

- Download the SLAX base from http://slax.linux-live.org

- Download the required modules from the above site. The modules I downloaded are :

- ClamAV 0.88.4
- md5deep_sha1deep
- wipe

- After finish download SLAX base and its module, I copy the whole SLAX base to my working directory :

# mount -t iso9660 -o loop slax-5.18.iso /media/images
# mkdir /home/tedi/projects/slax
# cp -R /media/images /home/tedi/projects/slax
# chown -R tedi.users /home/tedi/projects/slax/*

- Then I change to the SLAX directory :

$ cd projects/slax

- Remove kde_office.mo module

$ rm base/08_kde_office.mo

- Move three modules to modules/ directory :

$ mv ~/*.mo modules/

Here is the content of the modules/ directory :

-rw-r--r-- 1 tedi users 6758400 2006-12-06 12:11 ClamAV_0_88_4.mo
-rw-r--r-- 1 tedi users 118784 2006-12-06 11:37 md5deep_sha1deep_etc_1_12.mo
-rw-r--r-- 1 tedi users 40960 2006-12-06 11:37 wipe_0_20_1-1.mo

- After that I create a new SLAX iso :

$ ./make_iso.sh ../slax-new.iso
INFO: UTF-8 character encoding detected by locale settings.
Assuming UTF-8 encoded filenames on source filesystem,
use -input-charset to override.
mkisofs 2.01 (i686-suse-linux)
Scanning .
Scanning ./base
Scanning ./boot
Scanning ./boot/DOS
Excluded by match: ./boot/isolinux.boot
Scanning ./devel
Scanning ./modules
Scanning ./optional
Scanning ./rootcopy
Scanning ./tools
Scanning ./tools/WIN
Writing: Initial Padblock Start Block 0
Done with: Initial Padblock Block(s) 16
Writing: Primary Volume Descriptor Start Block 16
Done with: Primary Volume Descriptor Block(s) 1
Writing: Eltorito Volume Descriptor Start Block 17
Size of boot image is 4 sectors -> No emulation
Done with: Eltorito Volume Descriptor Block(s) 1
Writing: Joliet Volume Descriptor Start Block 18
Done with: Joliet Volume Descriptor Block(s) 1
Writing: End Volume Descriptor Start Block 19
Done with: End Volume Descriptor Block(s) 1
Writing: Version block Start Block 20
Done with: Version block Block(s) 1
Writing: Path table Start Block 21
Done with: Path table Block(s) 4
Writing: Joliet path table Start Block 25
Done with: Joliet path table Block(s) 4
Writing: Directory tree Start Block 29
Done with: Directory tree Block(s) 11
Writing: Joliet directory tree Start Block 40
Done with: Joliet directory tree Block(s) 10
Writing: Directory tree cleanup Start Block 50
Done with: Directory tree cleanup Block(s) 0
Writing: Extension record Start Block 50
Done with: Extension record Block(s) 1
Writing: The File(s) Start Block 51
5.51% done, estimate finish Wed Dec 6 23:23:06 2006
11.03% done, estimate finish Wed Dec 6 23:23:15 2006
16.55% done, estimate finish Wed Dec 6 23:23:30 2006
22.05% done, estimate finish Wed Dec 6 23:23:28 2006
27.56% done, estimate finish Wed Dec 6 23:23:27 2006
33.08% done, estimate finish Wed Dec 6 23:23:30 2006
38.58% done, estimate finish Wed Dec 6 23:23:29 2006
44.10% done, estimate finish Wed Dec 6 23:23:30 2006
49.60% done, estimate finish Wed Dec 6 23:23:32 2006
55.13% done, estimate finish Wed Dec 6 23:23:33 2006
60.63% done, estimate finish Wed Dec 6 23:23:34 2006
66.15% done, estimate finish Wed Dec 6 23:23:36 2006
71.65% done, estimate finish Wed Dec 6 23:23:35 2006
77.17% done, estimate finish Wed Dec 6 23:23:37 2006
82.67% done, estimate finish Wed Dec 6 23:23:37 2006
88.19% done, estimate finish Wed Dec 6 23:23:37 2006
93.69% done, estimate finish Wed Dec 6 23:23:36 2006
99.20% done, estimate finish Wed Dec 6 23:23:37 2006
Total translation table size: 2048
Total rockridge attributes bytes: 7043
Total directory bytes: 18432
Path table size(bytes): 134
Done with: The File(s) Block(s) 90525
Writing: Ending Padblock Start Block 90576
Done with: Ending Padblock Block(s) 150
Max brk space used 0
90726 extents written (177 MB)

- To test the new iso, I use "qemu" :

$ cd
$ qemu -cdrom slax-new.iso -boot d

- When the new SLAX started, I login and check whether the new modules are there, and yes they are.

- Time to celebrate.... :d

In the next installment, I will try to modify existing modules and add several more application to SLAX.

Until next time

Practise My Linux Skills

I feel my Linux skills have become a little bit rusty. To resharpen my Linux skills, I am planning to develop a simple Linux Live-CD.

Here are several Linux Live-CDs that I am researching on :

I will write about my experiences in this blog. So keep on checking....

Thursday, November 30, 2006

Psiphon : Firewall Hoppers to Fight Censorship

I read an interesting project developed by experts at University of Toronto. This project is called Psiphon.

With this project, an Internet user who live in a censored country can use server in uncensored country to access the Internet. And all the web traffic between users is encrypted and secure. A very good project for privacy.

So let's download the software on Dec. 1, 2006 and try it out.

Generate Secure Password Online

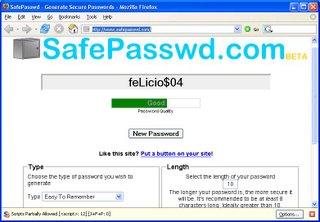
I found out a website that can help us in generating secure password. It's called SafePasswd.

Here is a screenshot when I generated a secure password (not anymore :D) :


Wednesday, November 08, 2006

Resize Images Using convert

A friend of mine has a lot of images. Those images are very beautiful. Unfortunately I found out that the image size was very big. One of them has 2592x1944 pixels dimension and of course the size is gigantic (1MB) (!).

I remembered sometimes ago I played a little bit with "convert", an application to :

convert between image formats as well as resize an image,
blur, crop, despeckle, dither, draw on, flip, join, re-sample, and much more.

Convert is a tool available in ImageMagick package.

So here is the command to resize that big image :

convert -resize 648x486 Picture\ 021.jpg Picture\ 021a.jpg

Notes :

- For -resize option you can give whatever argument suitable for that image. I resize the image to a quarter of its origin dimension.

- I resized the image to another file, just in case the result is not good enough I can always revert to the original file.

The convertion process will take sometime depends on your computer speed.

The gigantic image now becomes a smaller image (its size only 71.5KB).

Wednesday, September 20, 2006

Attack on SSL/TLS

I just read several articles regarding another attack on SSL by Bleichenbacher in Adam's blog.

Here are the interesting articles :

Enjoy reading them.

Wednesday, September 06, 2006

Creating PDF from PS files

Several years ago, I wrote a thesis about Elliptic Curve Cryptography. At that time, I splitted the files by chapter, so I have chapter 1-5. And these files were in PS format.

Yesterday, I decided to convert those files to PDF.

Here is how I do the conversion :

First I used ps2pdf program to convert PS to PDF files :

$ ps2pdf13 ch01.ps

and so on.

I found out that chapter 1,3 and 5 contain one empty page. So I removed the empty page on the last page using pdftk program :

$ pdftk ch01.pdf cat 1-3 output ch01-new.pdf
$ pdftk ch03.pdf cat 1-13 output ch03-new.pdf
$ pdftk ch05.pdf cat 1-2 output ch05-new.pdf


Then I concatenatted those 5 PDF files into one big file (ecc-thesis.pdf) :

$ pdftk ch01-new.pdf ch02.pdf ch03-new.pdf ch04.pdf ch05-new.pdf output ecc-thesis.pdf

Tuesday, August 29, 2006

SHA-1 Under Pressure

I just read a news article regarding a demonstration on a modified method of attack against a reduced variant of the SHA-1 hash algorithm.

My suggestion, if you need more security, then start to use SHA-256 or even SHA-512. For normal usage, you can still use SHA-1 but may be not for a long time.

You can also read the know-how about the hash crack.

Wednesday, August 16, 2006

Creating Snort-Inline RPM in OpenSUSE 10.1

I couldn't install snort-inline, because it needs libnet 1.0.2a. In my system I have already installed libnet 1.1.0 required by dsniff-2.4.0. This silly problem made me crazy for several days.

Finally I got an enlightenment.

First, make sure you've installed iptables-devel package.

To resolve this problem, I downgraded dsniff to dsniff-2.3-1.guru.suse100
(http://rpm.pbone.net) and removed libnet 1.1.0.

# rpm -e dsniff-2.4.0
# rpm -Uvh dsniff-2.3-1.guru.suse100.i686.rpm
Preparing... ########################################### [100%]
1:dsniff ########################################### [100%]
# rpm -e libnet


Then I install libnet-1.0.2a-1.snort :

# rpm -Uvh libnet-1.0.2a-1snort.i386.rpm
Preparing... ########################################### [100%]

1:libnet ########################################### [100%]


After that I create snort RPMS :

$ rpmbuild -tb snort-2.6.0.tar.gz --with inline --with mysql
...

Wrote: /home/tedi/rpms/RPMS/i586/snort-inline-2.6.0-1.i586.rpm

Wrote: /home/tedi/rpms/RPMS/i586/snort-inline-mysql-2.6.0-1.i586.rpm

...

Nessus 3.03 in OpenSUSE 10.1

Several days ago, I installed Nessus on my machine (OpenSUSE 10.1). From the website, I didn't find Nessus package for my machine, instead I downloaded packages for SUSE 10.

The installation was a breeze :

# rpm -Uvh Nessus-3.0.3-suse10.0.i586.rpm
Preparing... ########################################### [100%]
1:Nessus ########################################### [100%]


nessusd (Nessus) 3.0.3. for Linux

(C) 1998 - 2006 Tenable Network Security, Inc.


Processing the Nessus plugins...

[##################################################]


All plugins loaded


- Please run /opt/nessus//sbin/nessus-add-first-user to add an admin user
- Register your Nessus scanner at http://www.nessus.org/register/
to obtain
all the newest plugins
- You can start nessusd by typing /etc/rc.d/nessusd start


After that, I just followed what has been instructed on the installation.

# /opt/nessus/sbin/nessus-add-first-user
Using /var/tmp as a temporary file holder


Add a new nessusd user
----------------------

Login : admin
Authentication (pass/cert) [pass] :
Login password :

Login password (again) :


User rules
----------


nessusd has a rules system which allows you to restrict the hosts

that admin has the right to test. For instance, you may want

him to be able to scan his own host only.


Please see the nessus-adduser(8) man page for the rules syntax


Enter the rules for this user, and hit ctrl-D once you are done :
(the user can have an empty rules set)


Login : admin

Password : ***********

DN :

Rules :


Is that ok ? (y/n) [y]

user added.

Thank you. You can now start Nessus by typing :

/opt/nessus//sbin/nessusd -D


I start Nessus :

# /etc/init.d/nessusd start

After that I installed the client, apparently now they separated Nessus server and client :

# rpm -Uvh NessusClient-1.0.0.RC5-suse10.0.i586.rpm
Preparing... ########################################### [100%]
1:NessusClient ########################################### [100%]


Then I checked my computer using NessusClient :

$ /opt/nessus/bin/NessusClient

Tuesday, August 15, 2006

Developing Crypto Code in Python

I am currently doing a research on how to develop crypto code in Python programming language.

Based on my research, there are several crypto libraries that's suitable for my purpose. They are Python Cryptography Toolkit and ezPyCrypto as my main libraries.

Python Cryptography Toolkit will be the low-level crypto library, while ezPyCrypto will act as a high-level crypto library.

Before installing those two libraries, make sure you have have the following packages :

  • python
  • python-devel

Here are the steps to install those libraries :

- Install Python Cryptography Toolkit (python-crypto) :

# rpm -Uvh python-crypto-2.0.1-15.i586.rpm
Preparing... ########################################### [100%]
1:python-crypto ########################################### [100%]


- Install ezPyCrypto :

$ tar xvzpf ezPyCrypto-0.1.1.tar.gz

$ cd ezPyCrypto-0.1.1/

$ su -c "python setup.py install"

Password:

running install

running build

running build_py

creating build

creating build/lib

copying ezPyCrypto.py -> build/lib

running install_lib

creating /usr/local/lib/python2.4

creating /usr/local/lib/python2.4/site-packages

copying build/lib/ezPyCrypto.py -> /usr/local/lib/python2.4/site-packages

byte-compiling /usr/local/lib/python2.4/site-packages/ezPyCrypto.py to ezPyCrypto.pyc

Thursday, July 13, 2006

Saying Hello and Goodbye in Rails

Several days ago, I finished install Rails on my system. At that time, I didn't have anything to show you about the easiness of Rails.

In this occasion I will show you how easy it is to create a simple web-based application. The application will just display "hello" and "goodbye".

First, I create an application called "demo" :

$ rails demo
create
create app/controllers
create app/helpers
create app/models
create app/views/layouts
...
create log/test.log

Next, I create a controller "Say" :
$ cd demo
$ ruby script/generate controller Say
exists app/controllers/
exists app/helpers/
create app/views/say
...


Then I create two actions in say_controller.rb :

$ cd app/controllers

Here is my say_controller.rb file :

class SayController <> def hello
@time = Time.now
end
def goodbye
end
end


Next, I create two views for each action (hello.rhtml and goodbye.rhtml) :

$ cd app/views/say

Here is the content of hello.rhtml :


Hello, Rails!


Hello from Rails!


It is now <%= @time %>.


Time to say

<%= link_to "Goodbye!", :action => "goodbye" %>


Here is the content of goodbye.rhtml :

See You Later!


Goodbye!


It was nice having you here.


Say <%= link_to "Hello", :action => "hello" %> again.


After that I start the server :

$ pwd
demo

$ script/server
=> Booting WEBrick...

=> Rails application started on http://0.0.0.0:3000

=> Ctrl-C to shutdown server; call with --help for options

[2006-07-12 22:16:23] INFO WEBrick 1.3.1

[2006-07-12 22:16:23] INFO ruby 1.8.4 (2005-12-24) [i586-linux]

[2006-07-12 22:16:23] INFO WEBrick::HTTPServer#start: pid=5225 port=3000

Now it's time to show some pretty pictures. :D


Installing Ruby on Rails

During my adventure to install Ruby on Rails, I didn't find a detailed guide explaining the process, what component should be install first, etc.

So here is my note regarding Ruby on Rails installation using gem. Please note that I install the components using gem local installation.

Install the following components first using gem :

# gem install activesupport-1.3.1.gem
Attempting local installation of 'activesupport-1.3.1.gem'
Successfully installed activesupport, version 1.3.1

Installing RDoc documentation for activesupport-1.3.1...


# gem install actionpack-1.12.3.gem
Attempting local installation of 'actionpack-1.12.3.gem'
Successfully installed actionpack, version 1.12.3
Installing RDoc documentation for actionpack-1.12.3...

# gem install actionmailer-1.2.3.gem
Attempting local installation of 'actionmailer-1.2.3.gem'
Successfully installed actionmailer, version 1.2.3
Installing RDoc documentation for actionmailer-1.2.3...

# gem install activerecord-1.14.3.gem
Attempting local installation of 'activerecord-1.14.3.gem'
Successfully installed activerecord, version 1.14.3
Installing RDoc documentation for activerecord-1.14.3...

# gem install rake-0.7.1.gem
Attempting local installation of 'rake-0.7.1.gem'
Successfully installed rake, version 0.7.1
Installing RDoc documentation for rake-0.7.1...

# gem install actionwebservice-1.1.4.gem
Attempting local installation of 'actionwebservice-1.1.4.gem'
Successfully installed actionwebservice, version 1.1.4
Installing RDoc documentation for actionwebservice-1.1.4...


Then install rails :

# gem install rails-1.1.4.gem
Attempting local installation of 'rails-1.1.4.gem'
Successfully installed rails, version 1.1.4


After that you can check whether rails has been installed using the following command :

$ rails --help
Usage: /usr/bin/rails /path/to/your/app [options]

...

View CHM Files in OpenSUSE 10.1

To be able to view chm files in OpenSUSE 10.1 you need to install the following software packages :

chmlib-0.37.4-1.i586.rpm
compat-expat1-1.95.8-6.i586.rpm

expat-2.0.0-13.i586.rpm

libmspack-0.0.20040308alpha-16.i586.rpm

wxGTK-2.6.1.0-4.i586.rpm

xchm-1.2-1.i586.rpm


You can find those packages in http://rpm.pbone.net


After success download those files, just install them :


# rpm -Uvh *.rpm


Enjoy

Friday, June 16, 2006

Playing DVD in OpenSUSE 10.1

The default xine and xine-lib packages provided by SUSE 10.1 can't be used to play DVD. So you need to uninstall them and install the following packages :

  • libxine1-1.1.2cvs-060514.i586.rpm
  • xine-ui-0.99.4cvs-051003.i586.rpm
  • libdvdcss2-1.2.9-1.i386.rpm
  • w32codec-0.52-1.i386.rpm
You can find those packages at http://packman.link2linux.org

After that you can enjoy watching DVDs. :D

Playing MP3 Files in OpenSUSE 10.1

The default XMMS Library provided by OpenSUSE 10.1 doesn't have MP3 capabilities. In other words, you can't play MP3 files using the default XMMS library installed by OpenSUSE 10.1.

To solve the problem, I installed XMMS Library from http://packman.links2linux.org

Here is the filename :

xmms-lib-1.2.10-103.pm.1.i586.rpm

To install it, just use the following command :

# rpm -Fvh xmms-lib-1.2.10-103.pm.1.i586.rpm


After that command run without errors, you can play MP3 files.

Friday, April 21, 2006

Having Fun with PySQLite

I had a chance to test pysqlite, a Python wrapper for SQLite Database System. pysqlite needs the following dependencies :

  • Operating System and C Compiler
  • SQLite version 3.0.8 or later (for pysqlite 2.2.0)
  • Python 2.3 or later
After download the latest version (2.2.2) I did the followings to install pysqlite to my system :

$ tar xvzpf pysqlite-2.2.2.tar.gz
pysqlite-2.2.2/

pysqlite-2.2.2/doc/

pysqlite-2.2.2/doc/code

...

pysqlite-2.2.2/setup.cfg

pysqlite-2.2.2/setup.py

pysqlite-2.2.2/PKG-INFO


$ cd pysqlite-2.2.2/


$ python setup.py build

running build

running build_py

creating build

creating build/lib.linux-i686-2.4

creating build/lib.linux-i686-2.4/pysqlite2

...


# python setup.py install

running install

running build

running build_py

running build_ext

running install_lib

...


In my system, the above command will install pysqlite to /usr/lib/python2.4/site-packages directory


Next I test whether the installation success or not :


$ python

Python 2.4 (#1, Mar 22 2005, 21:42:42)
[GCC 3.3.5 20050117 (prerelease) (SUSE Linux)] on linux2
Type "help", "copyright", "credits" or "license" for more information.
>>> from pysqlite2 import test
>>> test.test()
......................................................................
----------------------------------------------------------------------
Ran 164 tests in 1.060s
OK

>>>

Next
I type several lines of Python code to test PySQLite. Here is the code. Please beware this is just a simple application :


#!/usr/bin/env python

from pysqlite2 import dbapi2 as sqlite
import os

DB_FILE = "mydb"

musics = [
("Michael W Smith", "In My Arms Again"),
("Chayanne", "Ye Te Amo"),
("Marc Anthony", "Everything You Do")
]

if os.path.exists(DB_FILE):
os.remove(DB_FILE)

con = sqlite.connect(DB_FILE)

# create table
con.execute("""
create table music
(
singer varchar(30),
song varchar(30)
)
""")
print "Success creating table",'"%s"' % DB_FILE

# insert table
con.executemany("insert into music(singer,song) values (?,?)", musics)

# print table contents
print "\nThe content of", DB_FILE
print "=" * 20,"\n"

for row in con.execute("select singer,song from music"):
print '%s : %s' % (row[0],row[1])

con.close()

Wednesday, April 19, 2006

Why Windows is less secure than Linux

I just read a blog entry title "Why Windows is less secure than Linux". In that blog there are some interesting pictures describing system calls in Apache and IIS.

The first picture is of the system calls that occur on a Linux server running Apache.
The second image is of a Windows Server running IIS.

Just wondering who can master the intricacies of IIS, it's so darn complex. :D

Monday, April 17, 2006

Another Webserver Performance Tool : autobench

In my last blog, I wrote about httperf. This time I will write about another tool. The tool
is autobench. It is a wrapper for httperf.

To install autobench, just do the followings :

$ make
# make install


To run it, type :

$ autobench
Autobench configuration file not found
- installing new copy in /home/tedi/.autobench.conf

Installation complete - please rerun autobench

I use the example from autobench website :

$ autobench --single_host --host1 localhost --uri1 /index.html --quiet --low_rate 20 --high_rate 200 --rate_step 20 --num_call 10 --num_conn 5000 --timeout 5 --file result.tsv

Will benchmark "localhost/index.html", with a series of tests starting at 20 connections per second (with 10 requests per connection), and increasing by 20 connections per second until 200 connections a second are being requested.

Each test will comprise a total of 5000 connections, and any responses which took longer than 5 seconds to arrive will be counted as errors. The results will be saved in the file 'result.tsv'.


And here is the result :

dem_req_rate req_rate_localhost con_rate_localhost min_rep_rate_localhost avg_rep_rate_localhost max_rep_rate_localhost stddev_rep_rate_localhost resp_time_localhost net_io_localhost errors_localhost
200 200.0 20.0 200.0 200.0 200.0 0.0 0.1 814.0 0
400 400.1 40.0 400.0 400.0 400.0 0.0 0.1 1628.0 0
600 600.1 60.0 600.0 600.0 600.1 0.0 0.1 2442.0 0
800 800.1 80.0 800.0 800.1 800.1 0.0 0.1 3256.1 0
1000 1000.2 100.0 1000.0 1000.1 1000.1 0.0 0.1 4070.0 0
1200 1200.2 120.0 1200.0 1200.1 1200.1 0.0 0.1 4884.0 0
1400 1400.3 140.0 1400.0 1400.1 1400.1 0.1 0.1 5698.1 0
1600 1600.3 160.0 1600.0 1600.1 1600.1 0.1 0.1 6512.0 0
1800 1800.2 180.0 1800.0 1800.1 1800.1 0.1 0.1 7325.7 0
2000 2000.3 200.0 1999.9 2000.1 2000.1 0.1 0.1 8139.8 0

Testing Web Performance with httperf

I got another tool for testing webperformance. This tool is httperf. It was developed by David Mosberger from HP.

The installation process is very smooth and usual :

$ ./configure
$ make

# make install


Next I try httperf to issue 1000 HTTP requests :

$ httperf --server localhost --port 80 --num-conns 100 --rate 10 --timeout 2

The above command will create 100 connections during 10 seconds (1000 requests).

Here is the result (it is not pretty) :

Total: connections 100 requests 100 replies 100 test-duration 9.901 s

Connection rate: 10.1 conn/s (99.0 ms/conn, <=1 concurrent connections)
Connection time [ms]: min 0.1 avg 0.3 max 15.0 median 0.5 stddev 1.5
Connection time [ms]: connect 0.0
Connection length [replies/conn]: 1.000

Request rate: 10.1 req/s (99.0 ms/req)
Request size [B]: 60.0

Reply rate [replies/s]: min 10.0 avg 10.0 max 10.0 stddev 0.0 (1 samples)
Reply time [ms]: response 0.3 transfer 0.0
Reply size [B]: header 217.0 content 3880.0 footer 0.0 (total 4097.0)
Reply status: 1xx=0 2xx=100 3xx=0 4xx=0 5xx=0

CPU time [s]: user 0.38 system 9.50 (user 3.9% system 95.9% total 99.8%)
Net I/O: 41.0 KB/s (0.3*10^6 bps)

Errors: total 0 client-timo 0 socket-timo 0 connrefused 0 connreset 0
Errors: fd-unavail 0 addrunavail 0 ftab-full 0 other 0


I leave the interpretation of the above statistics to the readers.

Wednesday, April 12, 2006

Testing Webserver Performance using IDX-Tsunami

Last night I tried to use IDX-Tsunami. It is a distributed load testing tool. It is protocol-independent and can currently be used to stress testing HTTP, SOAP and Jabber servers.

After download it from its website the installation process was very easy (if you've already had Erlang OTP).

Installation

To install IDX-Tsunami, I just did the followings :

$ tar xvzpf idx-tsunami-1.1.0.tar.gz
$ cd idx-tsunami-1.1.0/
$ ./configure
$ make
# make install

If there is no error, IDX-Tsunami will be installed in directory /usr/local[/bin|/share/doc/|/lib/]

Configuration

If the installation process is easy, the configuration part is quite challenging. :D But luckily I can managed to get the configuration file working.

Here is the scenario I use :

I only have one machine name "suse". It has an IP address at 192.168.1.1. And
here is the entry of my /etc/hosts file :
#
# IP-Address Full-Qualified-Hostname Short-Hostname
#

192.168.1.1 suse.site suse

Please do not use IP "127.0.0.1", it doesn't work on my system.

I want to do stress testing to my webserver at "suse" port 80. It contains
a simple webpage in "index.html".

I can't show the config file here. It's hidden by this blogger.

Put that config file in $HOMEDIR/.idx-tsunami/

To help you in creating session, there is a helper to do that (recorder). Just start the recorder :

$ idx-tsunami recorder


it will listen on port 8090

Then set your browser to use proxy at that port, and browse the website you want to measure.

When you're done, just give the following command :


$ idx-tsunami stop_recorder

The session name will be created in recorder log file. Here is the content of that file in my system :
< name="'rec20060414-08:13'" popularity="'100'" type="'ts_http'">
<>
< /session>

Just put those lines in idx-tsunami.xml file.

After finish configuring idx-tsunami config file, start the idx-tsunami :

$ idx-tsunami start
Creating idx-tsunami log directory /home/tedi/.idx-tsunami/log
Starting IDX-Tsunami


If there is no error, it will create a directory named "log". In that directory there will be another subdirectory named with current-date and current-time.

In my system, it looks like this :

tedi@suse:~/.idx-tsunami>ll log/
drwxr-xr-x 2 tedi users 4096 2006-04-11 21:04 20060411-14:04


The time is in GMT format.

You can check the status of IDX-Tsunami by using this command :

tedi@suse:~> idx-tsunami status
IDX-Tsunami is running [OK]
Current request rate: 0.782037 req/sec
Current users: 14
Current phase: 1


After that you can wait till the end of the test. In my configuration, the test takes
around 10 minutes to finish.

If anytime you want to stop the idx-tsunami before it is finished you can do that by issuing :

$ idx-tsunami stop

Next, you can analyze the results, change the parameters in the configuration file and relaunch another benchmark.

Reporting

To create reports, idx-tsunami needs Template Toolkit and gnuplot. So I installed those packages first.

After successfully installed those packages, I created the statistics report by
issuing the following :

$ cd .idx-tsunami/log/20060414-08:55
$ /usr/local/lib/idx-tsunami/bin/analyse_msg.pl --stats idx-tsunami.log --html --plot


That script will create report.html.

Here is the content of "report.html" in my system :


Tuesday, April 11, 2006

A Simple Webserver Performance Comparison Test

Last week, I had a long weekend (3 days off). It made me very bored. During that time I read PC Magazine. In it there is an article regarding several web performance tools. One of them is ab2 that is included in the Apache webserver.

For a long time I want to measure the performance of several webservers. That article inspired me to test the performance of several webservers.

The webservers I want to measure are Apache 2.0.55, Yaws
, lighttpd and WEBrick (included with Ruby, actually it is not a webserver per se but a low-level web framework). My testing method may not be scientific enough, but at least it gives me a clue about the performance of the webservers I mentioned above.

Here are the methods I will use :

  • create a static webpage (it is a copy of http://tedi.heriyanto.net)
  • Apache will listen on port 80
  • Lighttpd will listen on port 80
  • Yaws will listen on port 8000
  • WEBrick will listen on port 8080
  • using ab2 request for a static webpage for 200 times from each webserver
  • using ab2 request for a static webpage for 2000 times from each webserver
Notes :
In this document, I will not give details about the installation of each webserver. You can consult with the appropriate documents for that.


Apache Setup

I setup the Apache so it can handle each user website from the URL : http://website/~user/

It's a default setting in my SUSE Prof 9.3 Apache (version 2.0.55).


The directory is
/home/tedi/public_html
There I put file
index.html to that directory

Lighttpd Setup

I just use the default Lighttpd configuration.
The webpage is store in /srv/www/htdocs

Yaws Setup


I created a special directory for Yaws (
test-yaws) and it contains static webpage (index.html). I configure Yaws (yaws.conf) with the following virtual server :


WEBrick Setup

For WEBrick, I had to write a simple webserver code like the following :

#!/usr/bin/env ruby
require 'webrick'
include WEBrick

def start_webrick(config={})
config.update(:Port => 8080)
server = HTTPServer.new(config)

['INT', 'TERM'].each {|signal|
trap(signal) {server.shutdown}
}

server.start
end

start_webrick(:DocumentRoot => '/home/tedi/public_html')


Starting Apache


To start apache just use the following command :


# rcapache start


Starting Lighttpd

To start lighttpd just type the following command :


# /etc/init.d/lighttpd start

Starting Yaws

To start Yaws, I use the following command :


$ bin/yaws -i
Erlang (BEAM) emulator version 5.4.12 [source] [hipe]

Eshell V5.4.12 (abort with ^G)
1>
=INFO REPORT==== 10-Apr-2006::13:30:21 ===
Yaws: Using config file /home/tedi/yaws.conf
yaws:Add path "/home/tedi/software/erlang/yaws/scripts/../examples/ebin"
yaws:Add path "/home/tedi/software/erlang/yaws/examples/ebin"
yaws:Running with id="default"
Running with debug checks turned on (slower server)
Logging to directory "/home/tedi/yaws_logs"

=INFO REPORT==== 10-Apr-2006::13:30:21 ===
Yaws: Listening to 0.0.0.0:8000 for servers
- http://suse:8000 under /home/tedi/software/erlang/yaws/scripts/../www
- http://localhost:8000 under /home/tedi/test-yaws


Starting WEBrick

To start WEBrick just type the following command :

$ ruby webserver.rb
[2006-04-10 13:26:52] INFO WEBrick 1.3.1
[2006-04-10 13:26:52] INFO ruby 1.8.2 (2004-12-25) [i686-linux]
[2006-04-10 13:26:52] WARN TCPServer Error: Address already in use - bind(2)
[2006-04-10 13:26:52] INFO WEBrick::HTTPServer#start: pid=6893 port=8080


Testing

Here are the commands I used to test Apache webserver performance :

/usr/sbin/ab2 -n 200 -c 10 http://localhost/~tedi/index.html
/usr/sbin/ab2 -n 2000 -c 10 http://localhost/~tedi/index.html


Here are the commands I used to test Lighttpd webserver performance :

/usr/sbin/ab2 -n 200 -c 10 http://localhost/index.html
/usr/sbin/ab2 -n 2000 -c 10 http://localhost/index.html


Here are the commands I used to test Yaws webserver performance :


/usr/sbin/ab2 -n 200 -c 10 http://localhost:8000/index.html
/usr/sbin/ab2 -n 2000 -c 10 http://localhost:8000/index.html


Here are the commands I used to test WEBrick webserver performance :

/usr/sbin/ab2 -n 200 -c 10 http://localhost:8080/index.html
/usr/sbin/ab2 -n 2000 -c 10 http://localhost:8080/index.html


Results

For 200 connections

Apache


Software: Apache/2.0.55
Document Length: 4782 bytes

Concurrency Level: 10
Time taken for tests: 0.89339 seconds
Complete requests: 200
Total transferred: 1013400 bytes
HTML transferred: 956400 bytes
Requests per second: 2238.66 [#/sec] (mean)
Time per request: 4.467 [ms] (mean)
Time per request: 0.447 [ms] (mean, across all concurrent requests)
Transfer rate: 11070.19 [Kbytes/sec] received

Connection Times (ms)
min mean[+/-sd] median max
Connect: 0 0 0.9 0 4
Processing: 2 2 1.4 3 6
Waiting: 1 1 0.8 1 4
Total: 3 3 1.0 3 6

Percentage of the requests served within a certain time (ms)
50% 3
66% 3
75% 3
80% 3
90% 6
95% 6
98% 6
99% 6
100% 6 (longest request)

Yaws

Server Software: Yaws/1.57
Document Length: 4782 bytes

Concurrency Level: 10
Time taken for tests: 0.171134 seconds
Complete requests: 200
Total transferred: 1026120 bytes
HTML transferred: 975528 bytes
Requests per second: 1168.67 [#/sec] (mean)
Time per request: 8.557 [ms] (mean)
Time per request: 0.856 [ms] (mean, across all concurrent requests)
Transfer rate: 5855.06 [Kbytes/sec] received

Connection Times (ms)
min mean[+/-sd] median max
Connect: 0 1 1.1 2 5
Processing: 1 2 1.0 3 6
Waiting: 0 1 1.0 1 4
Total: 4 4 0.8 4 7

Percentage of the requests served within a certain time (ms)
50% 4
66% 4
75% 4
80% 4
90% 5
95% 7
98% 7
99% 7
100% 7 (longest request)

Lighttpd

Server Software: lighttpd/1.4.11
Document Length: 4782 bytes

Concurrency Level: 10
Time taken for tests: 0.53806 seconds
Complete requests: 200
Total transferred: 1003000 bytes
HTML transferred: 956400 bytes
Requests per second: 3717.06 [#/sec] (mean)
Time per request: 2.690 [ms] (mean)
Time per request: 0.269 [ms] (mean, across all concurrent requests)
Transfer rate: 18195.00 [Kbytes/sec] received

Connection Times (ms)
min mean[+/-sd] median max
Connect: 0 0 1.0 1 3
Processing: 1 1 0.8 1 4
Waiting: 0 0 0.7 0 3
Total: 2 2 0.6 2 4

Percentage of the requests served within a certain time (ms)
50% 2
66% 2
75% 2
80% 2
90% 4
95% 4
98% 4
99% 4
100% 4 (longest request)


WEBrick

Server Software: WEBrick/1.3.1
Document Length: 4782 bytes

Concurrency Level: 10
Time taken for tests: 1.435260 seconds
Complete requests: 200
Total transferred: 1009582 bytes
HTML transferred: 960496 bytes
Requests per second: 139.35 [#/sec] (mean)
Time per request: 71.763 [ms] (mean)
Time per request: 7.176 [ms] (mean, across all concurrent requests)
Transfer rate: 686.29 [Kbytes/sec] received

Connection Times (ms)
min mean[+/-sd] median max
Connect: 0 0 0.2 0 1
Processing: 35 55 23.6 54 277
Waiting: 20 38 23.4 37 258
Total: 35 55 23.7 54 278

Percentage of the requests served within a certain time (ms)
50% 54
66% 56
75% 58
80% 59
90% 66
95% 70
98% 77
99% 272
100% 278 (longest request)


For 2000 connections

Apache

Software: Apache/2.0.55
Document Length: 4782 bytes

Concurrency Level: 10
Time taken for tests: 0.658329 seconds
Complete requests: 2000
Total transferred: 10134000 bytes
HTML transferred: 9564000 bytes
Requests per second: 3037.99 [#/sec] (mean)
Time per request: 3.292 [ms] (mean)
Time per request: 0.329 [ms] (mean, across all concurrent requests)
Transfer rate: 15032.00 [Kbytes/sec] received

Connection Times (ms)
min mean[+/-sd] median max
Connect: 0 0 0.5 0 4
Processing: 1 2 0.8 2 7
Waiting: 1 1 0.5 1 5
Total: 2 2 1.0 2 7

Percentage of the requests served within a certain time (ms)
50% 2
66% 3
75% 3
80% 3
90% 3
95% 4
98% 6
99% 6
100% 7 (longest request)


Lighttpd

Server Software: lighttpd/1.4.11
Document Length: 4782 bytes

Concurrency Level: 10
Time taken for tests: 0.416057 seconds
Complete requests: 2000
Total transferred: 10060090 bytes
HTML transferred: 9592692 bytes
Requests per second: 4807.03 [#/sec] (mean)
Time per request: 2.080 [ms] (mean)
Time per request: 0.208 [ms] (mean, across all concurrent requests)
Transfer rate: 23612.15 [Kbytes/sec] received

Connection Times (ms)
min mean[+/-sd] median max
Connect: 0 0 0.4 0 2
Processing: 0 1 0.7 1 5
Waiting: 0 0 1.0 1 4
Total: 0 1 0.8 1 7

Percentage of the requests served within a certain time (ms)
50% 1
66% 1
75% 2
80% 2
90% 2
95% 3
98% 3
99% 4
100% 7 (longest request)


Yaws

Server Software: Yaws/1.57
Document Length: 4782 bytes

Concurrency Level: 10
Time taken for tests: 1.32380 seconds
Complete requests: 2000
Total transferred: 10060000 bytes
HTML transferred: 9564000 bytes
Requests per second: 1937.27 [#/sec] (mean)
Time per request: 5.162 [ms] (mean)
Time per request: 0.516 [ms] (mean, across all concurrent requests)
Transfer rate: 9515.88 [Kbytes/sec] received

Connection Times (ms)
min mean[+/-sd] median max
Connect: 0 0 0.0 0 0
Processing: 0 3 18.1 2 605
Waiting: 0 3 18.1 2 605
Total: 0 3 18.1 2 605

Percentage of the requests served within a certain time (ms)
50% 2
66% 2
75% 3
80% 3
90% 4
95% 4
98% 6
99% 7
100% 605 (longest request)


WEBrick

Server Software: WEBrick/1.3.1
Document Length: 4782 bytes

Concurrency Level: 10
Time taken for tests: 13.272744 seconds
Complete requests: 2000
Total transferred: 10054582 bytes
HTML transferred: 9568096 bytes
Requests per second: 150.68 [#/sec] (mean)
Time per request: 66.364 [ms] (mean)
Time per request: 6.636 [ms] (mean, across all concurrent requests)
Transfer rate: 739.71 [Kbytes/sec] received

Connection Times (ms)
min mean[+/-sd] median max
Connect: 0 4 95.0 0 2999
Processing: 4 61 15.2 66 251
Waiting: 0 43 13.4 48 236
Total: 27 65 95.4 66 3059

Percentage of the requests served within a certain time (ms)
50% 66
66% 67
75% 68
80% 69
90% 70
95% 71
98% 77
99% 87
100% 3059 (longest request)


Remarks


Here are the summary of the time taken to complete requests for each webserver :


200 connections

Yaws :

Time taken for tests: 0.171134 seconds
Requests per second: 1168.67 [#/sec] (mean)
Time per request: 8.557 [ms] (mean)
Time per request: 0.856 [ms] (mean, across all concurrent requests)
Transfer rate: 5855.06 [Kbytes/sec] received

Lighttpd :

Time taken for tests: 0.53806 seconds
Requests per second: 3717.06 [#/sec] (mean)
Time per request: 2.690 [ms] (mean)
Time per request: 0.269 [ms] (mean, across all concurrent requests)
Transfer rate: 18195.00 [Kbytes/sec] received


Apache :

Time taken for tests: 0.89339 seconds
Requests per second: 2238.66 [#/sec] (mean)
Time per request: 4.467 [ms] (mean)
Time per request: 0.447 [ms] (mean, across all concurrent requests)
Transfer rate: 11070.19 [Kbytes/sec] received

WEBrick :

Time taken for tests: 1.435260 seconds
Requests per second: 139.35 [#/sec] (mean)
Time per request: 71.763 [ms] (mean)
Time per request: 7.176 [ms] (mean, across all concurrent requests)
Transfer rate: 686.29 [Kbytes/sec] received


2000 connections

Lighttpd :

Time taken for tests: 0.416057 seconds
Requests per second: 4807.03 [#/sec] (mean)
Time per request: 2.080 [ms] (mean)
Time per request: 0.208 [ms] (mean, across all concurrent requests)
Transfer rate: 23612.15 [Kbytes/sec] received


Apache :

Time taken for tests: 0.658329 seconds
Requests per second: 3037.99 [#/sec] (mean)
Time per request: 3.292 [ms] (mean)
Time per request: 0.329 [ms] (mean, across all concurrent requests)
Transfer rate: 15032.00 [Kbytes/sec] received


Yaws :

Time taken for tests: 1.32380 seconds
Requests per second: 1937.27 [#/sec] (mean)
Time per request: 5.162 [ms] (mean)
Time per request: 0.516 [ms] (mean, across all concurrent requests)
Transfer rate: 9515.88 [Kbytes/sec] received


WEBrick :

Time taken for tests: 13.272744 seconds
Requests per second: 150.68 [#/sec] (mean)
Time per request: 66.364 [ms] (mean)
Time per request: 6.636 [ms] (mean, across all concurrent requests)
Transfer rate: 739.71 [Kbytes/sec] received


Based on the information above, I can infer that the followings are the fastest webserver in descending order :
  • Lighttpd
  • Apache
  • Yaws
  • WEBrick

Please note that the file used is a static webpage. The result may be different if we use a dynamic webpage.

Wednesday, April 05, 2006

Develop A Simple Webserver using Webrick

Last week during my weekend, I got bored with security stuffs. So I tried something new. I read Programming Ruby 2nd edition. In it I found out about Webrick.

I thought this was a cool stuff. With Webrick you can create your own webserver in Ruby. Isn't that cool?

So I hacked the code for a simple webserver :
#!/usr/bin/env ruby
require 'webrick'
include WEBrick

s = HTTPServer.new(
:Port => 2000,

:DocumentRoot => File.join(Dir.pwd,"/home/tedi/public_html")

)

trap("INT") { s.shutdown }
s.start


After that, I started the webserver :
$ ruby webserver.rb
[2006-04-01 22:24:32] INFO WEBrick 1.3.1
[2006-04-01 22:24:32] INFO ruby 1.8.2 (2004-12-25) [i686-linux]

[2006-04-01 22:24:32] WARN TCPServer Error: Address already in use - bind(2)

[2006-04-01 22:24:32] INFO WEBrick::HTTPServer#start: pid=7117 port=2000

To test it, I launched my browser :


To shutdown the webserver, just press Ctrl-C :
[2006-04-01 22:29:10] INFO going to shutdown ...
[2006-04-01 22:29:10] INFO WEBrick::HTTPServer#start done.

Tuesday, March 07, 2006

AVG Antivirus for Linux

Several days ago, I had a chance to test AVG antivirus for Linux. I download the suitable package for my SUSE system.

The installation process was very smooth, just do the usual RPM command :

# rpm -Uvh avglinux-7.1-23_free_suse_avi0676.i386.rpm
Preparing... ########################################### [100%]
1:avglinux ########################################### [100%]
avgd 0:off 1:off 2:off 3:on 4:off 5:on 6:off


AVG7 Anti-Virus command line scanner

Copyright (c) 2005 GRISOFT, s.r.o.

Program version 7.1.23, engine 718

Virus Database: Version 267.14.1/206 2005-12-16

License type is FREE.

Please launch the '/opt/grisoft/avggui/bin/avggui_update_licinfo.sh'
script as root for updating license information.


AVG 7.1 Anti-Virus Free for Linux successfully installed.

Next I run the script to update license information :

# /opt/grisoft/avggui/bin/avggui_update_licinfo.sh

I test the antivirus GUI :


If you want to update the virus database just download the new virus database from Grisoft website and put them somewhere.

To update call the following program :

# /opt/grisoft/avg7/bin/avgupdate -f

I put the virus database update in my flash disk (mounted as /media/TEDI), so the complete command will be :

# /opt/grisoft/avg7/bin/avgupdate -f /media/TEDI/
Updating...

Offline update finished successfully.


AVG for Linux is just too darn cool, its GUI is written in Python+GTK. Very cool indeed.

Monday, February 20, 2006

Formatting USB Flash Disk for VFAT filesystem

Here are the steps I took to format my USB flash disk for VFAT filesystem. I chose this filesystem because it is supported in Windows and also in Linux :

  • Unmount the usb disk (if it is still in use) :
# umount /dev/sda1
  • Format the usb disk :
# mkfs.vfat -c -n TEDI /dev/sda1
mkfs.vfat 2.10 (22 Sep 2003)
  • Check the usb disk :
# dosfsck -vV /dev/sda1
dosfsck 2.10 (22 Sep 2003)
dosfsck 2.10, 22 Sep 2003, FAT32, LFN
Checking we can access the last sector of the filesystem
Boot sector contents:
System ID "mkdosfs"
Media byte 0xf8 (hard disk)
512 bytes per logical sector
4096 bytes per cluster
1 reserved sector
First FAT starts at byte 512 (sector 1)
2 FATs, 16 bit entries
125440 bytes per FAT (= 245 sectors)
Root directory starts at byte 251392 (sector 491)
512 root directory entries
Data area starts at byte 267776 (sector 523)
62578 data clusters (256319488 bytes)
32 sectors/track, 16 heads
0 hidden sectors
501148 sectors total
Starting check/repair pass.
Checking for unused clusters.
Starting verification pass.
Checking for unused clusters.
/dev/sda1: 2 files, 0/62578 clusters

Thursday, February 09, 2006

First Encounter with Scapy

After read several papers and presentations in network security field that mentioning scapy, I decided to try it.

From the Scapy website :

Scapy is a powerful interactive packet manipulation program. It is able to forge or decode packets of a wide number of protocols, send them on the wire, capture them, match requests and replies, and much more. It can easily handle most classical tasks like scanning, tracerouting, probing, unit tests, attacks or network discovery (it can replace hping, 85% of nmap, arpspoof, arp-sk, arping, tcpdump, tethereal, p0f, etc.). It also performs very well at a lot of other specific tasks that most other tools can't handle, like sending invalid frames, injecting your own 802.11 frames, combining technics (VLAN hopping+ARP cache poisoning, VOIP decoding on WEP encrypted channel, ...), etc.

What interest me are :

  • scapy is written in Python. I am quite familiar with this computer language. I code translation tools in this language about 4 years ago.
  • it supports many network protocol even wifi (you need Wifitap tool :D)
I download the latest scapy version from http://www.secdev.org/projects/scapy/.
And the installation process is a breeze. I just put it in my working directory. BTW, scapy needs several optional package to work as advertised. But in my system I don't follow that. :D

I just put http://www.iana.org/assignments/ethernet-numbers to /etc/ethertypes.

You need to run scapy as root.

In this first encounter, I will try to ping to other host :

>>> sr(IP(dst="192.168.198.128")/ICMP())
Begin emission:
*Finished to send 1 packets.

Received 1 packets, got 1 answers, remaining 0 packets
(, )

Looks good.

Next I tried to ping localhost :

# python scapy.py
INFO: did not find python gnuplot wrapper . Won't be able to plot
INFO: Can't import PyX. Won't be able to use psdump() or pdfdump()
Welcome to Scapy (1.0.3.1beta)

>>> sr1(IP(dst="127.0.0.1")/ICMP())
Begin emission:
.Finished to send 1 packets.

Received 1 packets, got 0 answers, remaining 1 packets

It looks like there is an error, but I don't know where.

If you know what's wrong and how to fix that, please let me know.
Trying Nmap 4.00

Several days ago, I read an announcement about Nmap 4.00 release. In that announcement there are at least 200 fixes and features added to this version compare to Nmap 3.50. And also Fyodor said this version has many performance improvement I couldn't resist to download the newest version.

Last night, I installed it on my machine.

When I tried to run it first :
# nmap localhost

It complained about some DNS servers problem.

Starting Nmap 4.00 ( http://www.insecure.org/nmap/) at 2006-02-02 00:06 WIT
Unable to determine any DNS servers. Try using --system_dns or specify valid servers with --dns_servers
QUITTING!
I fired up the manual page :
$ man nmap

Fortunately I don't have to read the whole manual, my eyes caught something interesting about -n option (Never do DNS resolution). Cha-ching.

Notes (as of Feb 8, 2006) :
Last night, I checked my /etc/resolv.conf file and looked like there is no nameserver. So I setup the nameserver and I didn't need to specify -n option anymore.

I run nmap again, but this time I chose other machine as a target :
# nmap -sV -O 192.168.x.y

Starting Nmap 4.00 ( http://www.insecure.org/nmap/ ) at 2006-02-02 00:10 WIT
Warning: OS detection will be MUCH less reliable because we did not find at least 1 open and 1 closed TCP port
All 1672 scanned ports on 192.168.x.y are: closed
MAC Address: aa:bb:cc:dd:ee:ff
Device type: general purpose
Running: Apple Mac OS X 10.1.X, Apple Mac OS 8.X, FreeBSD 5.X|6.X
Too many fingerprints match this host to give specific OS details

Nmap finished: 1 IP address (1 host up) scanned in 11.046 seconds

A new feature that interesting is now you can specify some option while nmap is running (it is called runtime interaction). To get the supported options, press "?" and it will display the information like this :

Interactive keyboard commands:
? Display this information
v/V Increase/decrease verbosity
d/D Increase/decrease debugging
p/P Enable/disable packet tracing
anything else Print status
More help: http://www.insecure.org/nmap/man/man-runtime-interaction.html

I played a little bit with verbosity level. I set it to level 5 (by pressing "v" button 5 times) :

# nmap -sV -O -P0 192.168.198.128

Starting Nmap 4.00 ( http://www.insecure.org/nmap/ ) at 2006-02-08 23:32 WIT
Verbosity Increased to 1.
Verbosity Increased to 2.
Verbosity Increased to 3.
Verbosity Increased to 4.
Verbosity Increased to 5.
DNS resolution of 1 IPs took 13.00s. Mode: Async [#: 1, OK: 0, NX: 0, DR: 1, SF: 0, TR: 3, CN: 0]
Initiating SYN Stealth Scan against 192.168.198.128 [1672 ports] at 23:33
Increasing send delay for 192.168.198.128 from 0 to 5 due to max_successful_tryno increase to 4
The SYN Stealth Scan took 10.27s to scan 1672 total ports.
Warning: OS detection will be MUCH less reliable because we did not find at least 1 open and 1 closed TCP port
Host 192.168.198.128 appears to be up ... good.
All 1672 scanned ports on 192.168.198.128 are: closed
MAC Address: 00:0C:29:C0:60:1A (VMware)
Device type: general purpose
Running: Apple Mac OS X 10.1.X, Apple Mac OS 8.X, FreeBSD 5.X|6.X
Too many fingerprints match this host to give specific OS details
TCP/IP fingerprint:
SInfo(V=4.00%P=i686-pc-linux-gnu%D=2/8%Tm=43EA1D4E%O=-1%C=1%M=000C29)
T5(Resp=Y%DF=Y%W=0%ACK=S++%Flags=AR%Ops=)
T6(Resp=Y%DF=Y%W=0%ACK=O%Flags=R%Ops=)
T7(Resp=Y%DF=Y%W=0%ACK=S%Flags=AR%Ops=)
PU(Resp=Y%DF=N%TOS=0%IPLEN=38%RIPTL=148%RID=E%RIPCK=E%UCK=0%ULEN=134%DAT=E)

Nmap finished: 1 IP address (1 host up) scanned in 23.918 seconds
Raw packets sent: 1912 (76.8KB) | Rcvd: 1677 (77.1KB)

Another interesting interactive command is p (for packet tracing, it's like our old beloved tcpdump output) :

# nmap -sV -O -P0 192.168.198.128

.Packet Tracing enabled
.SENT (15.9950s) TCP 192.168.198.1:52479 > 192.168.198.128:158 S ttl=41 id=53246 iplen=40 seq=1815539322 win=2048
SENT (15.9950s) TCP 192.168.198.1:52479 > 192.168.198.128:164 S ttl=43 id=44916 iplen=40 seq=1815539322 win=4096
SENT (15.9950s) TCP 192.168.198.1:52479 > 192.168.198.128:740 S ttl=58 id=19079 iplen=40 seq=1815539322 win=3072


Pressing any other key beside the ones listed on the interactive keyboard command will display current status. Here I use "spacebar" :

# nmap -sV -O -P0 192.168.198.128

System DNS resolution Timing: About 0.00% done; ETC: 20:11 (596:31:18 remaining)
Stats: 0:00:10 elapsed; 0 hosts completed (0 up), 0 undergoing ARP Ping Scan
System DNS resolution Timing: About 0.00% done; ETC: 20:11 (596:31:13 remaining)
Stats: 0:00:18 elapsed; 1 hosts completed (1 up), 1 undergoing SYN Stealth Scan
SYN Stealth Scan Timing: About 52.58% done; ETC: 23:40 (0:00:04 remaining)